I thought you might like a treat bag for just your special Trick or Treaters. I will try to give you directions, call with questions.
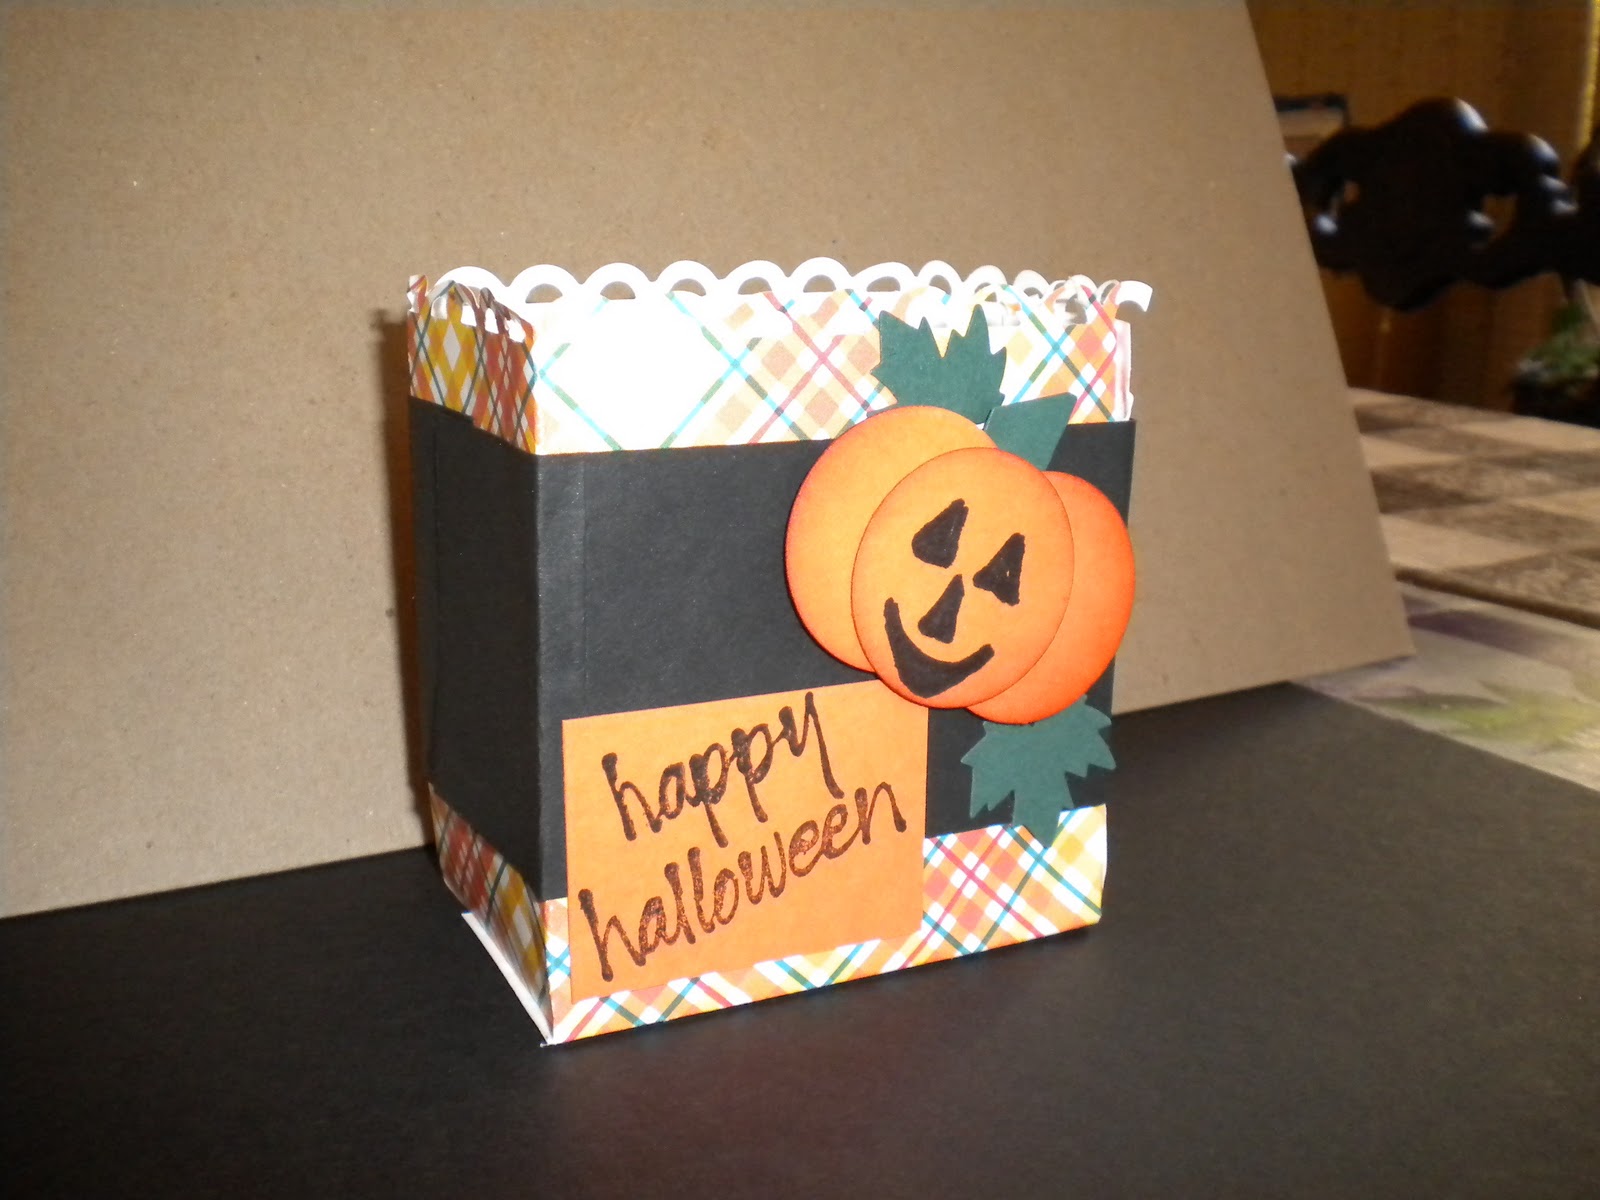
Cut a piece of orange card stock ( I used a orangish plaid) 5 1/2" x 11" Score along the narrow side, the entire length at 1 1/2" . Then going across the length of the paper, score at 1",3",2",3' you should have a 2inch piece left. Across the bottom where the 1 1/2" cross the other folds, cut with scissors each of the scored lined 1 1/2" just up to the fold line across the sheet. This will form the bottom of the box. Fold all the folds inward, form a rectangle. With sticky tape glue the last 2" over the 1" piece, secureing the rectangle. Fold the two small cuts up. Put sticky tape on the 3'' lengths and fold up, one over the other. Set your bag upright, reach inside and put pressure on the bottom to get the pieces to stick to each other.
Now I cut a strip of black, 2"x 11". I scored across the strip at 1"2",3",2". You should have a 3" piece let. Fold the folds inward. Secure the black strip around the bag.
I punch out 3 circles out of orange, burnished the edges with a brown ink. Glue two of the circles together, overlaping them about 1/4 of the way. I took a black marker and drew on the face and then glued this over the other 2. I cut a sm strip of green paper to make a stem and glued this to the back of the pumpkins. I happened to have a small leaf punch and cut out 2 leaves. You don't need to put leaves on unless you want to. Glue the pumpkin to one of the 3' sides. Cut a small piece of orange and either stamp happy halloween or write it on with a marker. Looking at the finished piece may help you figure out what I am talking about. Oh, I had a fancy border punch and punched across the top before I folded anything. It is OK just to leave it plain. Now I hope you aren"t saying HUH!
No comments:
Post a Comment